
SSE Notification Dropdown Component Documentation

1. Overview

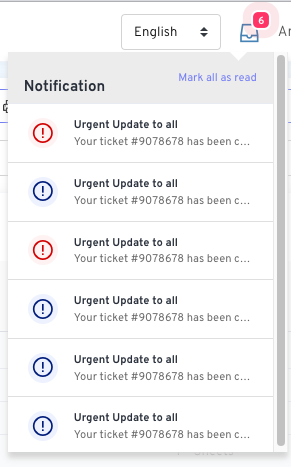
This document provides instructions for developers on how to implement and use the real-time SSE (Server-Sent Events) notification dropdown component. The component is built with Vue.js 2 and is designed to work with a Laravel backend. It supports two real-time update methods: a simple Database Polling stream and a high-performance Redis Pub/Sub stream.

Key Features

  • Real-Time Updates: Pushes notifications from the server to the client without page reloads.
  • Dual Backend Support: Choose between simple polling or high-performance Redis.
  • Highly Customizable: Uses props and slots for easy customization of appearance and behavior.
  • Efficient: Far more resource-friendly than traditional client-side polling (e.g., setInterval).
  • Standalone: Manages its own state, including unread counts and notification lists.

2. Frontend Usage (Vue Component)

SSE Notification Dropdown This section covers how to integrate the NotificationDropdown.vue component into a parent Vue component or Blade file.

2.1. Prerequisites

Ensure you have axios installed in your project for the “Mark all as read” functionality.
npm install axios

2.2. Component Props

PropTypeRequiredDefaultDescription
titleStringNo'Notifications'The title displayed at the top of the dropdown list.
sseUrlStringYes-The URL endpoint for the Server-Sent Events stream.
markReadUrlStringYes-The URL endpoint for the “Mark all as read” POST request.
initialNotificationsArrayNo[]An array of pre-loaded notification objects to display on page load.
initialUnreadCountNumberNo0The initial number of unread notifications to display on the badge.

2.3. Component Slots

a. anchor

This slot allows you to customize the trigger icon/button for the dropdown. Example:
<notification-dropdown ...>
    <template #anchor>
        <i class="fas fa-envelope" style="font-size: 24px;"></i>
    </template>
</notification-dropdown>

b. item

This slot provides full control over how each notification in the list is rendered. It receives the notification object as a scoped property. Example:
<notification-dropdown ...>
    <template #item="{ notification }">
        <a :href="notification.url" class="custom-item">
            <div class="custom-icon-wrapper">...</div>
            <div class="custom-content">
                <strong>{{ notification.title }}</strong>
                <p>{{ notification.message }}</p>
                <small>{{ notification.created_at }}</small>
            </div>
        </a>
    </template>
</notification-dropdown>

2.4. Complete Parent Component Example

Here is how you would set up a parent component (or a Blade file with a Vue instance) to use the notification dropdown.

a. Blade File (dashboard.blade.php)

@php
    // Fetch and format initial notifications in the controller that renders this view
    $userId = auth()->id();
    $unreadNotifications = \App\Models\Notification::where(function($q) use ($userId) {
            $q->where('notifiable_id', '=', $userId)
              ->orWhere('notifiable_id', '=', new \MongoDB\BSON\ObjectId($userId));
        })
        ->whereNull('read_at')
        ->orderBy('created_at', 'desc')
        ->get();

    $initialNotifications = \App\Http\Resources\NotificationResource::collection($unreadNotifications);
    $unreadCount = $unreadNotifications->count();
@endphp

<div id="app">
    {{-- Example for General Notifications --}}
    <notification-dropdown
        title="General Notifications"
        sse-url="{{ route('notifications.pollStream') }}"
        mark-read-url="{{ route('notifications.markRead') }}"
        :initial-notifications='@json($initialNotifications)'
        :initial-unread-count="{{ $unreadCount }}"
    >
        <template #anchor>
            <i class="las la-bell" style="font-size: 24px;"></i>
        </template>
    </notification-dropdown>

    {{-- Example for another type of notification, e.g., Messages --}}
    {{-- <notification-dropdown
        title="Messages"
        sse-url="{{ route('messages.sseStream') }}"
        mark-read-url="{{ route('messages.markRead') }}"
        :initial-notifications='@json($initialMessages)'
        :initial-unread-count="{{ $unreadMessageCount }}"
    >
        <template #anchor>
            <i class="las la-envelope" style="font-size: 24px;"></i>
        </template>
    </notification-dropdown> --}}
</div>
Note: The database queries are written to support both standard numeric/UUID user IDs and MongoDB ObjectIds. You can simplify this to ->where('notifiable_id', $userId) if you are not using MongoDB.

3. Backend Setup (Laravel)

The backend provides the SSE stream and the endpoint to mark notifications as read.

3.1. Shared Components (Required for Both Methods)

a. Notification Resource

This resource standardizes the JSON format for notifications sent to the frontend.
php artisan make:resource NotificationResource
app/Http/Resources/NotificationResource.php
<?php
namespace App\Http\Resources;
use Illuminate\Http\Resources\Json\JsonResource;

class NotificationResource extends JsonResource
{
    public function toArray($request)
    {
        return [
            'id' => $this->id,
            'title' => data_get($this->data, 'title', 'Notification'),
            'message' => data_get($this->data, 'message', 'You have a new update.'),
            'type' => data_get($this->data, 'type', 'info'),
            'read_at' => $this->read_at,
            'created_at' => $this->created_at->toDateTimeString(),
        ];
    }
}

b. NotificationController & Routes

This controller contains the logic for the SSE streams and marking notifications as read. routes/web.php
use App\Http\Controllers\NotificationController;

Route::middleware('auth')->group(function () {
    // Endpoints for Method 1: Polling
    Route::get('/notification/poll-stream', [NotificationController::class, 'pollStream'])->name('notifications.pollStream');

    // Endpoints for Method 2: Redis Pub/Sub
    Route::get('/notification/pubsub-stream', [NotificationController::class, 'pubsubStream'])->name('notifications.pubsubStream');

    // Shared endpoint
    Route::post('/notifications/mark-all-read', [NotificationController::class, 'markAllRead'])->name('notifications.markRead');
});

3.2. Method 1: Database Polling Stream (Simple)

This method queries the database every few seconds for new notifications.

a. Controller Method

app/Http/Controllers/NotificationController.php
<?php

namespace App\Http\Controllers;

use App\Models\Notification;
use Illuminate\Support\Facades\Auth;
use MongoDB\BSON\ObjectId;
use Symfony\Component\HttpFoundation\StreamedResponse;

class NotificationController extends Controller
{
    public function markAllRead() { /* ... see below ... */ }

    public function pollStream()
    {
        session()->save();
        $response = new StreamedResponse(function () {
            $userId = Auth::id();
            $lastCheck = now();

            while (true) {
                if (connection_aborted()) break;

                $newNotifications = Notification::where(function($q) use ($userId) {
                        $q->where('notifiable_id', $userId)->orWhere('notifiable_id', new ObjectId($userId));
                    })
                    ->whereNull('read_at')
                    ->where('created_at', '>', $lastCheck)
                    ->orderBy('created_at', 'asc')
                    ->get();

                if ($newNotifications->isNotEmpty()) {
                    foreach ($newNotifications as $notification) {
                        $payload = (new \App\Http\Resources\NotificationResource($notification))->toJson();
                        echo "event: new-notification\n";
                        echo "data: {$payload}\n\n";
                    }
                    $lastCheck = $newNotifications->last()->created_at;
                }

                echo ": heartbeat\n\n";
                if (ob_get_level() > 0) ob_flush();
                flush();
                sleep(3);
            }
        });
        $response->headers->set('Content-Type', 'text/event-stream');
        $response->headers->set('Cache-Control', 'no-cache');
        $response->headers->set('X-Accel-Buffering', 'no');
        return $response;
    }
}

b. Mark All Read Method

app/Http/Controllers/NotificationController.php
public function markAllRead()
{
    $userId = Auth::id();
    Notification::where(function($q) use ($userId) {
            $q->where('notifiable_id', $userId)->orWhere('notifiable_id', new ObjectId($userId));
        })
        ->whereNull('read_at')
        ->update(['read_at' => now()]);

    return response()->json(['status' => 'success']);
}
This event-driven method is highly efficient and provides instant updates.

a. Prerequisites & Configuration

  1. Install Redis server and the phpredis extension.
  2. Install Predis: composer require predis/predis
  3. Configure .env:
BROADCAST_DRIVER=redis
REDIS_HOST=127.0.0.1
REDIS_PORT=6379

b. Event, Observer, and Channel Auth

  1. Create Event:
php artisan make:event NotificationCreated --broadcast
Configure the event to format the broadcast payload using your NotificationResource. app/Events/NotificationCreated.php
<?php
namespace App\Events;

use App\Http\Resources\NotificationResource;
use Illuminate\Broadcasting\Channel;
use Illuminate\Broadcasting\InteractsWithSockets;
use Illuminate\Contracts\Broadcasting\ShouldBroadcast;
use Illuminate\Foundation\Events\Dispatchable;
use Illuminate\Notifications\DatabaseNotification;
use Illuminate\Queue\SerializesModels;

class NotificationCreated implements ShouldBroadcast
{
    use Dispatchable, InteractsWithSockets, SerializesModels;

    public function __construct(public DatabaseNotification $notification) {}

    public function broadcastOn(): Channel
    {
        return new Channel('laravel_database_private-notifications.' . $this->notification->notifiable_id);
    }

    public function broadcastAs(): string
    {
        // The event name the frontend will listen for
        return 'new-notification';
    }

    public function broadcastWith(): array
    {
        // This structure is what the SSE controller will receive
        return ['data' => new NotificationResource($this->notification)];
    }
}
  1. Create Observer:
php artisan make:observer NotificationObserver --model="Notifications\DatabaseNotification"
In the created method, dispatch the event whenever a new notification is saved to the database. app/Observers/NotificationObserver.php
<?php
namespace App\Observers;

use App\Events\NotificationCreated;
use Illuminate\Notifications\DatabaseNotification;

class NotificationObserver
{
    public function created(DatabaseNotification $notification): void
    {
        broadcast(new NotificationCreated($notification));
    }
}
  1. Register Observer: In app/Providers/EventServiceProvider.php, register the observer in the boot method:
\Illuminate\Notifications\DatabaseNotification::observe(\App\Observers\NotificationObserver::class);
  1. Authorize Channel: In routes/channels.php, authorize the private channel:
Broadcast::channel('notifications.{userId}', fn($user, $userId) => (int) $user->id === (int) $userId);

c. Controller Method

app/Http/Controllers/NotificationController.php
use Illuminate\Support\Facades\Redis;
// ... other imports

public function pubsubStream()
{
    session()->save();
    $response = new StreamedResponse(function () {
        $userId = Auth::id();
        $channel = "laravel_database_private-notifications.{$userId}";

        Redis::psubscribe([$channel], function ($message, $channel) {
            $eventPayload = json_decode($message);
            $eventName = $eventPayload->event;
            // The ->data->data structure matches what broadcastWith() returns
            $data = json_encode($eventPayload->data->data);

            echo "event: {$eventName}\n";
            echo "data: {$data}\n\n";

            if (ob_get_level() > 0) ob_flush();
            flush();
            if (connection_aborted()) return;
        });
    });
    $response->headers->set('Content-Type', 'text/event-stream');
    $response->headers->set('Cache-Control', 'no-cache');
    $response->headers->set('X-Accel-Buffering', 'no');
    return $response;
}

3.4. How to Send Notifications (Works for Both Methods)

Simply use Laravel’s standard notification system. The backend setup (either polling or the observer) will automatically handle the rest.
use App\Notifications\YourNotificationClass;
$user->notify(new YourNotificationClass($data));

4. Server Configuration (Important!)

SSE connections are long-lived and can cause 504 Gateway Timeout errors if the server is not configured correctly. You must disable proxy buffering for the SSE routes.

Nginx

location ~ ^/(notification/poll-stream|notification/pubsub-stream)$ {
    proxy_buffering off;
    proxy_cache off;
    proxy_read_timeout 3600s; # 1 hour
    # ... include other fastcgi_params ...
    fastcgi_pass unix:/var/run/php/php8.1-fpm.sock;
}

Apache

<LocationMatch "^/(notification/poll-stream|notification/pubsub-stream)">
    ProxyTimeout 3600
</LocationMatch>

Dokumentasi Komponen Notifikasi Dropdown Berbasis SSE

1. Ringkasan

Dokumen ini menyediakan instruksi bagi developer untuk mengimplementasikan dan menggunakan komponen dropdown notifikasi real-time berbasis SSE (Server-Sent Events). Komponen ini dibangun dengan Vue.js 2 dan dirancang untuk bekerja dengan backend Laravel. Komponen ini mendukung dua metode pembaruan real-time: stream Database Polling yang sederhana dan stream Redis Pub/Sub yang berperforma tinggi.

Fitur Utama

  • Pembaruan Real-Time: Mendorong notifikasi dari server ke klien tanpa perlu memuat ulang halaman.
  • Dukungan Backend Ganda: Pilih antara polling sederhana atau Redis yang berperforma tinggi.
  • Sangat Mudah Disesuaikan: Menggunakan props dan slots untuk kustomisasi tampilan dan fungsionalitas.
  • Efisien: Jauh lebih hemat sumber daya dibandingkan polling tradisional di sisi klien (misalnya, setInterval).
  • Mandiri: Mengelola statusnya sendiri, termasuk jumlah notifikasi yang belum dibaca dan daftar notifikasi.

2. Penggunaan Frontend (Komponen Vue)

Bagian ini membahas cara mengintegrasikan komponen NotificationDropdown.vue ke dalam komponen induk Vue atau file Blade.

2.1. Prasyarat

Pastikan Anda telah menginstal axios di proyek Anda untuk fungsionalitas “Tandai semua telah dibaca”.
npm install axios

2.2. Properti Komponen (Props)

PropTipeWajibDefaultDeskripsi
titleStringTidak'Notifications'Judul yang ditampilkan di bagian atas daftar dropdown.
sseUrlStringYa-URL endpoint untuk stream Server-Sent Events.
markReadUrlStringYa-URL endpoint untuk request POST “Tandai semua telah dibaca”.
initialNotificationsArrayTidak[]Array berisi objek notifikasi yang dimuat awal saat halaman dibuka.
initialUnreadCountNumberTidak0Jumlah awal notifikasi yang belum dibaca untuk ditampilkan pada badge.

2.3. Slot Komponen

a. anchor

Slot ini memungkinkan Anda untuk mengkustomisasi ikon/tombol pemicu untuk dropdown. Contoh:
<notification-dropdown ...>
    <template #anchor>
        <i class="fas fa-envelope" style="font-size: 24px;"></i>
    </template>
</notification-dropdown>

b. item

Slot ini memberikan kontrol penuh atas bagaimana setiap notifikasi dalam daftar ditampilkan. Slot ini menerima objek notification sebagai properti scoped. Contoh:
<notification-dropdown ...>
    <template #item="{ notification }">
        <a :href="notification.url" class="custom-item">
            <div class="custom-icon-wrapper">...</div>
            <div class="custom-content">
                <strong>{{ notification.title }}</strong>
                <p>{{ notification.message }}</p>
                <small>{{ notification.created_at }}</small>
            </div>
        </a>
    </template>
</notification-dropdown>

2.4. Contoh Lengkap Komponen Induk

Berikut adalah cara menyiapkan komponen induk (atau file Blade dengan instance Vue) untuk menggunakan dropdown notifikasi.

a. File Blade (dashboard.blade.php)

@php
    // Ambil dan format notifikasi awal di controller yang me-render view ini
    $userId = auth()->id();
    $unreadNotifications = \App\Models\Notification::where(function($q) use ($userId) {
            $q->where('notifiable_id', '=', $userId)
              ->orWhere('notifiable_id', '=', new \MongoDB\BSON\ObjectId($userId));
        })
        ->whereNull('read_at')
        ->orderBy('created_at', 'desc')
        ->get();

    $initialNotifications = \App\Http\Resources\NotificationResource::collection($unreadNotifications);
    $unreadCount = $unreadNotifications->count();
@endphp

<div id="app">
    {{-- Contoh untuk Notifikasi Umum --}}
    <notification-dropdown
        title="Notifikasi Umum"
        sse-url="{{ route('notifications.pollStream') }}"
        mark-read-url="{{ route('notifications.markRead') }}"
        :initial-notifications='@json($initialNotifications)'
        :initial-unread-count="{{ $unreadCount }}"
    >
        <template #anchor>
            <i class="las la-bell" style="font-size: 24px;"></i>
        </template>
    </notification-dropdown>
</div>
Catatan: Query database ditulis untuk mendukung ID pengguna standar (numerik/UUID) dan ObjectId MongoDB. Anda dapat menyederhanakannya menjadi ->where('notifiable_id', $userId) jika Anda tidak menggunakan MongoDB.

3. Penyiapan Backend (Laravel)

Backend menyediakan stream SSE dan endpoint untuk menandai notifikasi telah dibaca.

3.1. Komponen Bersama (Dibutuhkan untuk Kedua Metode)

a. Notification Resource

Resource ini berfungsi untuk menstandarisasi format JSON notifikasi yang dikirim ke frontend.
php artisan make:resource NotificationResource
app/Http/Resources/NotificationResource.php
<?php
namespace App\Http\Resources;
use Illuminate\Http\Resources\Json\JsonResource;

class NotificationResource extends JsonResource
{
    public function toArray($request)
    {
        return [
            'id' => $this->id,
            'title' => data_get($this->data, 'title', 'Notifikasi'),
            'message' => data_get($this->data, 'message', 'Anda memiliki pembaruan baru.'),
            'type' => data_get($this->data, 'type', 'info'),
            'read_at' => $this->read_at,
            'created_at' => $this->created_at->toDateTimeString(),
        ];
    }
}

b. NotificationController & Routes

Controller ini berisi logika untuk stream SSE dan menandai notifikasi telah dibaca. routes/web.php
use App\Http\Controllers\NotificationController;

Route::middleware('auth')->group(function () {
    // Endpoint untuk Metode 1: Polling
    Route::get('/notification/poll-stream', [NotificationController::class, 'pollStream'])->name('notifications.pollStream');

    // Endpoint untuk Metode 2: Redis Pub/Sub
    Route::get('/notification/pubsub-stream', [NotificationController::class, 'pubsubStream'])->name('notifications.pubsubStream');

    // Endpoint bersama
    Route::post('/notifications/mark-all-read', [NotificationController::class, 'markAllRead'])->name('notifications.markRead');
});

3.2. Metode 1: Stream Database Polling (Sederhana)

Metode ini melakukan query ke database setiap beberapa detik untuk mencari notifikasi baru.

a. Metode Controller

app/Http/Controllers/NotificationController.php
<?php
// ... imports ...
use App\Models\Notification;
use MongoDB\BSON\ObjectId;

class NotificationController extends Controller
{
    public function markAllRead() { /* ... lihat di bawah ... */ }

    public function pollStream()
    {
        // ... (Code as above) ...
    }
}

b. Metode Mark All Read

app/Http/Controllers/NotificationController.php
public function markAllRead()
{
    $userId = Auth::id();
    Notification::where(function($q) use ($userId) {
            $q->where('notifiable_id', $userId)->orWhere('notifiable_id', new ObjectId($userId));
        })
        ->whereNull('read_at')
        ->update(['read_at' => now()]);

    return response()->json(['status' => 'success']);
}

3.3. Metode 2: Stream Redis Pub/Sub (Disarankan)

Metode berbasis event ini sangat efisien dan memberikan pembaruan instan.

a. Prasyarat & Konfigurasi

  1. Instal server Redis dan ekstensi phpredis.
  2. Install Predis: composer require predis/predis
  3. Konfigurasi .env:
BROADCAST_DRIVER=redis
REDIS_HOST=127.0.0.1
REDIS_PORT=6379

b. Event, Observer, dan Otorisasi Channel

  1. Buat Event:
php artisan make:event NotificationCreated --broadcast
Konfigurasikan event untuk memformat payload broadcast menggunakan NotificationResource Anda. app/Events/NotificationCreated.php
// ... (Code as in English version) ...
  1. Buat Observer:
php artisan make:observer NotificationObserver --model="Notifications\DatabaseNotification"
Di metode created, panggil event setiap kali notifikasi baru disimpan ke database. app/Observers/NotificationObserver.php
<?php
namespace App\Observers;

use App\Events\NotificationCreated;
use Illuminate\Notifications\DatabaseNotification;

class NotificationObserver
{
    public function created(DatabaseNotification $notification): void
    {
        broadcast(new NotificationCreated($notification));
    }
}
  1. Daftarkan Observer: Di app/Providers/EventServiceProvider.php, daftarkan observer di metode boot:
\Illuminate\Notifications\DatabaseNotification::observe(\App\Observers\NotificationObserver::class);
  1. Otorisasi Channel: Di routes/channels.php, otorisasi private channel:
Broadcast::channel('notifications.{userId}', fn($user, $userId) => (int) $user->id === (int) $userId);

c. Metode Controller

app/Http/Controllers/NotificationController.php
// ... (Code as in English version) ...

3.4. Cara Mengirim Notifikasi (Berlaku untuk Kedua Metode)

Cukup gunakan sistem notifikasi standar Laravel. Penyiapan backend (baik polling maupun observer) akan menangani sisanya secara otomatis.
use App\Notifications\YourNotificationClass;
$user->notify(new YourNotificationClass($data));

4. Konfigurasi Server (Penting!)

Koneksi SSE berjalan lama dan dapat menyebabkan error 504 Gateway Timeout jika server tidak dikonfigurasi dengan benar. Anda harus menonaktifkan proxy buffering untuk route SSE.

Nginx

location ~ ^/(notification/poll-stream|notification/pubsub-stream)$ {
    proxy_buffering off;
    proxy_cache off;
    proxy_read_timeout 3600s; # 1 jam
    # ... sertakan fastcgi_params lainnya ...
    fastcgi_pass unix:/var/run/php/php8.1-fpm.sock;
}

Apache

<LocationMatch "^/(notification/poll-stream|notification/pubsub-stream)">
    ProxyTimeout 3600
</LocationMatch>

Addendum A: Testing with Artisan Command

To facilitate development and testing, a custom Artisan command is provided to send a test notification directly to any user.

A.1. Setup

a. Test Notification Class
php artisan make:notification TestNotification
app/Notifications/TestNotification.php
<?php
namespace App\Notifications;
use Illuminate\Bus\Queueable;
use Illuminate\Notifications\Notification;

class TestNotification extends Notification
{
    use Queueable;

    public function __construct(public string $title, public string $message, public string $type) {}

    public function via($notifiable): array
    {
        return ['database']; // Essential for this system
    }

    public function toArray($notifiable): array
    {
        return [
            'title' => $this->title,
            'message' => $this->message,
            'type' => $this->type,
        ];
    }
}
b. Artisan Command
php artisan make:command SendTestNotification
app/Console/Commands/SendTestNotification.php
<?php
namespace App\Console\Commands;

use App\Models\User;
use App\Notifications\TestNotification;
use Illuminate\Console\Command;

class SendTestNotification extends Command
{
    protected $signature = 'test:notification
                            {email : The email address of the user to notify}
                            {--title= : The title of the notification}
                            {--message= : The message content of the notification}
                            {--type= : The type for styling (info, success, warning, danger)}';

    protected $description = 'Sends a test database notification to a specified user.';

    public function handle(): int
    {
        $user = User::where('email', $this->argument('email'))->first();

        if (!$user) {
            $this->error("User with email '{$this->argument('email')}' not found.");
            return Command::FAILURE;
        }

        $title = $this->option('title') ?? 'Test Notification';
        $message = $this->option('message') ?? 'This is a test notification from Artisan.';
        $type = $this->option('type') ?? collect(['info', 'success', 'warning', 'danger'])->random();

        $this->info("Sending notification to: {$user->name}...");
        $user->notify(new TestNotification($title, $message, $type));
        $this->info('Notification sent successfully!');

        return Command::SUCCESS;
    }
}

A.2. Usage

a. Basic Command
php artisan test:notification [email protected]
b. Command with Custom Options
php artisan test:notification [email protected] --title="Urgent Update" --message="Your ticket has been closed." --type=danger

Adendum A: Pengujian dengan Perintah Artisan

Untuk memfasilitasi pengembangan dan pengujian, disediakan sebuah perintah Artisan kustom untuk mengirim notifikasi tes langsung ke pengguna manapun.

A.1. Penyiapan

a. Kelas Notifikasi Tes
php artisan make:notification TestNotification
app/Notifications/TestNotification.php
// ... (Code as in English version) ...
b. Perintah Artisan
php artisan make:command SendTestNotification
app/Console/Commands/SendTestNotification.php
<?php
namespace App\Console\Commands;

use App\Models\User;
use App\Notifications\TestNotification;
use Illuminate\Console\Command;

class SendTestNotification extends Command
{
    protected $signature = 'test:notification
                            {email : Alamat email pengguna yang akan diberi notifikasi}
                            {--title= : Judul notifikasi}
                            {--message= : Konten pesan notifikasi}
                            {--type= : Tipe untuk gaya (info, success, warning, danger)}';

    protected $description = 'Mengirim notifikasi tes via database ke pengguna yang ditentukan.';

    public function handle(): int
    {
        // ... (Logic as in English version) ...
    }
}

A.2. Cara Penggunaan

a. Perintah Dasar
php artisan test:notification [email protected]
b. Perintah dengan Opsi Kustom
php artisan test:notification [email protected] --title="Pembaruan Penting" --message="Tiket Anda telah ditutup." --type=danger